How to Cut Up a Whole Chicken
This post may contain affiliate links. Read the full disclosure here
Learn how to cut up a whole chicken in this step-by-step tutorial with pictures. A simple technique to improve your kitchen skills.

There are numerous ways to enhance kitchen skills which could have many benefits for a household. Saving money is at the top of many home cook’s lists. Learning to Cut Up a Whole Chicken is a beneficial kitchen skill that can potentially save a nice amount of money.
Why you should cut your own Whole Chicken
Butchering a whole chicken saves more than a just few dollars. A whole chicken usually cost $2-$3 less per pound than one already butchered. It’s an especially good investment when each member of your family likes different parts of the bird. That way you don’t have to buy different packages of parts to satisfy everyone. You can also but multiple birds to sort and freeze the parts as you desire.
How many pieces of chicken can you get from a whole chicken?
A chicken is usually cut into 8 pieces. However, you can cut the breasts in half for a total of 10 pieces. I prefer 10 cuts because whole breasts are harder to cook and eat in my opinion. Depending on the cut of the breast, you can get up to 12 pieces.
What you will need to cut up a whole chicken

Fresh whole chicken, innards removed
Cutting board
Kitchen scissors
Butchers knife
Knife sharpener
Before you begin, be sure to rinsed and dry the bird by patting it inside and outside with paper towels.
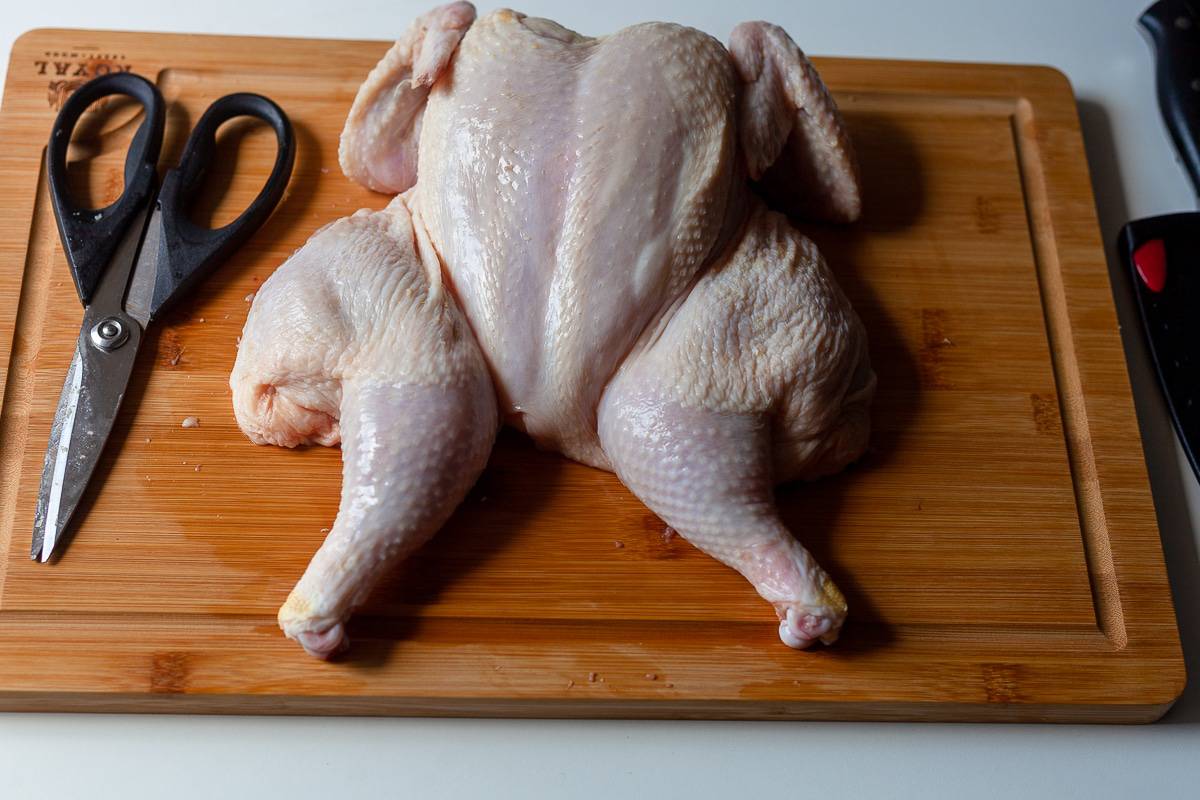
How to Butterfly cut or Spatchcock a whole chicken

A spatchcock or butterfly cut chicken is one that has been cut open such that the breast of the bird is fully intact and flatted while the backbone is removed. Spatchcocking allows the bird to cook evenly and rapidly. You can oven roast or grill a whole spatchcocked chicken in the same amount of time that you would sectioned pieces.

Step 1– Place the bird breast-side down on a cutting board with its legs towards you.
Step 2– Hold the tail of the bird with one hand and use the butcher’s knife to cut alongside the neck down to the tailbone on both sides.
Step 3– Flip the bird over breast-side up. Press the breastbone down to further flatten the bird and you are done.
How to quarter a whole chicken

Quartered chicken pieces are great for grilling recipes. After cutting alongside the neck down to the tailbone on both sides to butterfly the bird, turn the bird with the legs facing away from you.

Step 1– Cut the bird in half by placing one hand firmly on one side of the breast. Cut between the breast all from the top all the way down to the bottom. Shears are especially helpful in cutting through the breast bone.
Step 2– Next, cut both halves in half starting midway between the end of the breastbone and the thigh.
How to cut chicken into 8 pieces

8 pieces is the standard cut for chicken. The following steps show you how to cut quarters piece into 8ths.
Step 1– Locate the joint that connects the leg and the thigh. Hold leg firmly and cut the meat around the joint to expose it. Use the shears to cut through the joint cartilage to separate. Repeat on the other side.
Step 2– Locate the joint that connects the wing to the breast. Grip the wing firmly to make the joint accessible. Using the cutting shears, cut through the skin and the joint removing the wing. Repeat with the other breast quarter.
How to cut a chicken into 10 pieces by splitting the breast

At this point, you will have 8 pieces. Cutting the chicken into 10 pieces is perfect for frying because the breast isn’t too big and it serves more portions.
Step 1– To make 10 pieces, cut each breast in half evenly widthwise.
Put Your New Skills to Use
Try your new kitchen skills with one of my chicken recipes!
Lemon Pepper Chicken
Buttermilk Fried Chicken
Oven-Fried Chicken
WAS THIS TUTORIAL HELPFUL? LET ME KNOW YOUR THOUGHTS AND SUGGESTIONS IN THE COMMENTS. DON’T FORGET TO PIN THIS TIP FOR LATER!
You can also follow me on Pinterest | Instagram | Facebook for recipes not featured on this site!
*This tutorial was updated on 8/21/2020 for clarity and improved content. It was first published on 7/8/2017.*

This is AWSOME!!! I didn’t even know I needed this Tutorial! 🙂
I’m so glad it was helpful!